Walkthrough / FAQs / Guides 3
Chart 10:Obtaining the high jump
point
At the MAP, POINT location, if you destroy the second-from-the-right spot with a bomb, you can descend below! Use bombs 2-3 times to progress downwards and obtain the High Jump at the gate ahead! You'll gain a jump height 1.5 times greater than usual!
Chart 11:To the end of the hidden passage
point
After obtaining the High Jump, proceed forward from the lower part of the statue. Advance to the left while using bombs.
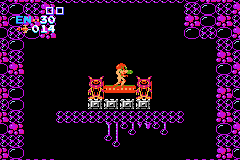
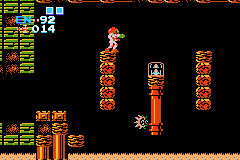
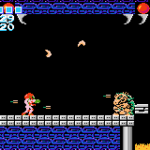
Chart 12:Obtaining the SCREW ATTACK

point
You can go to the upper level from the MAP, POINT location!! Jump at the timing when the blocks regenerate and proceed to the upper level. Let's obtain the Screw Attack at the gate ahead!! When performing a lateral jump, Samus will rotate and be able to attack enemies!
Chart 13:Return to Brinstar
point
Return along the path you came from and head back to Brinstar. The attacks are intense, but please do your best. ※If you get a game over, you can continue back to the elevator.
Chart 14:Four tubes
point
At the POINT on the map, there are four tube-like areas that you pass through with the Morph Ball. Aim for the top or second from the top. Enemies also enter these tubes, so proceed while dealing with them using bombs.
Chart 15:Obtaining the VARIA SUIT
point
At the POINT on the map, you can destroy the ceiling in a hidden passage. Without the High Jump, you won't reach the left gate, but you can advance now. Obtain the Varia Suit ahead in the room on the left.
※It's possible to clear the main story even without the Varia Suit.
Chart 16:Obtaining the Missiles
point
Proceed straight ahead to the right from the point where you broke the ceiling, and you'll find a "Missile Tank". Obtain it.
Chart 17:Obtaining the EnergyTank

point
Proceed further to the right from the Missile Tank in Chart 16, and you'll reach a dead end. There's a breakable ceiling, and by going right from there, you'll find an "Energy Tank". Retrieve it. All items have been collected in Brinstar! Next, proceed to Kraid.
Chart 18:Kraid's Lair
point
Proceed following the arrows in the image to advance to the next area, "Kraid's Lair". In the POINT area, destroy the floor with bombs and continue forward.
-
-
Metroid : Walkthrough 4
Walkthrough / FAQs / Guides 4 Chart 19:Obtaining the Missiles Chart 20:Obtaining the Missiles Chart 21:Obtaining the EnergyTank Chart 22:Obtaining the Missiles Chart 23: Fake Kraid Chart 24: In front of Kraid Chart 25:Recovery Chart 26:BOSS "Kraid" Chart 27:Obtaining the EnergyTank Chart 28:Obtaining the Missiles Chart 29:Return to Brinstar
Read more